Get your embed snippet
1
Open General settings
Sign in at aibco.ai/dashboard and go to General.
2
Copy the snippet
Scroll to the Install snippet section and click Copy snippet.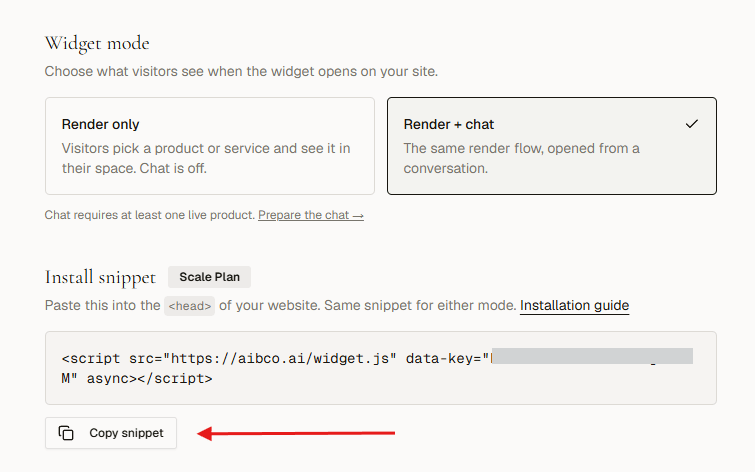
The same snippet works for both widget modes (Render Only and Render + Chat). You control the mode from the dashboard, so you never need to update your website code when you switch.
Where to paste the snippet
You have two placement options. Both work; pick based on what you care about more.- In the
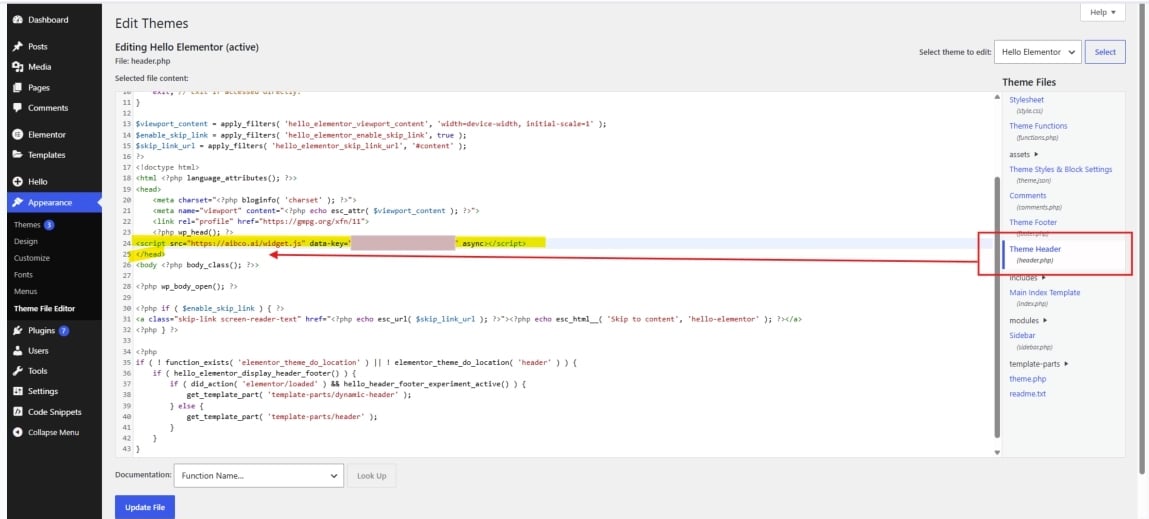
<head>tag (recommended). The widget script starts downloading as soon as the browser parses the page head, so the launcher appears at the earliest possible moment. Use this unless you have a specific reason not to. - Before the closing
</body>tag. The browser renders your page content first and only then fetches the widget. Use this if your page performance is very sensitive to third-party scripts, or if a strict content-security or performance budget on your site prefers deferred scripts.
async, so it will never block your page from rendering regardless of where you paste it. The only real difference is how soon the launcher becomes visible.
Platform instructions
Plain HTML (any site you edit directly)
Use this when you write HTML yourself or your platform is not listed below: a static site, a hand-coded landing page, a Next.js/Astro/Hugo/Jekyll project, or a CMS that gives you access to the raw HTML template.1
Open your site template
Open the HTML file (or template partial) that renders on every page you want the widget to appear on. In most projects this is a shared layout such as
index.html, layout.html, base.html, _document.tsx, or a header include.2
Paste the snippet in the head (recommended)
Paste your snippet just before the closing
</head> tag:3
Or paste before the closing body tag
If you would rather keep third-party scripts at the end of the document, paste it just before
</body> instead:4
Deploy your change
Save the file and deploy the site as you normally would. Reload the page on your authorized domain and the launcher should appear.
Squarespace
1
Open Code Injection
Log into Squarespace. Press 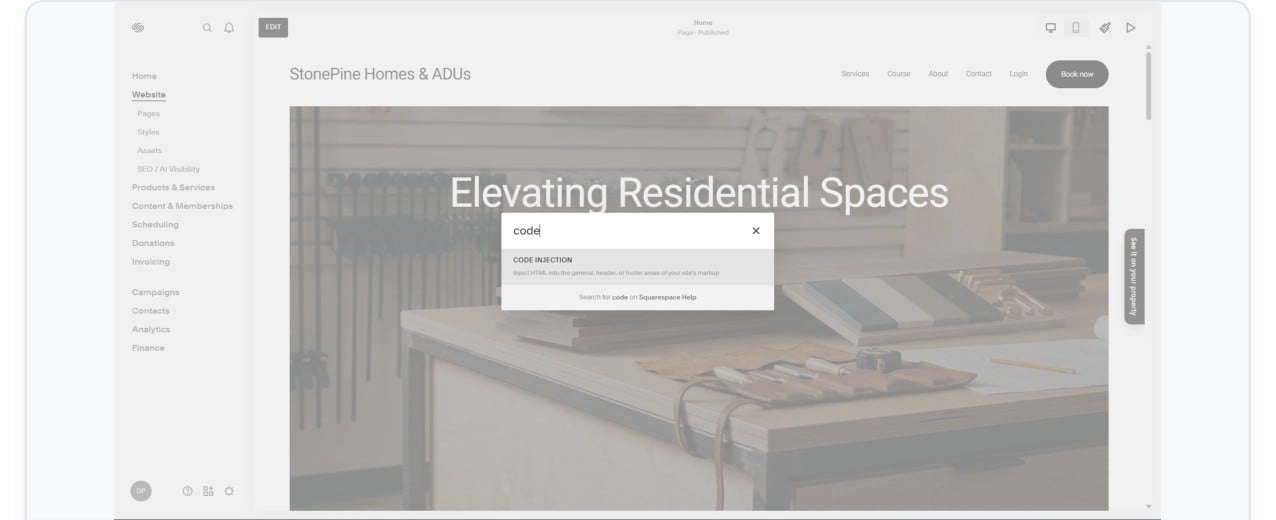
/ (or click the search bar) and search for Code Injection, then click it in the results.2
Paste in Header
Paste your AIBCO snippet into the Header field.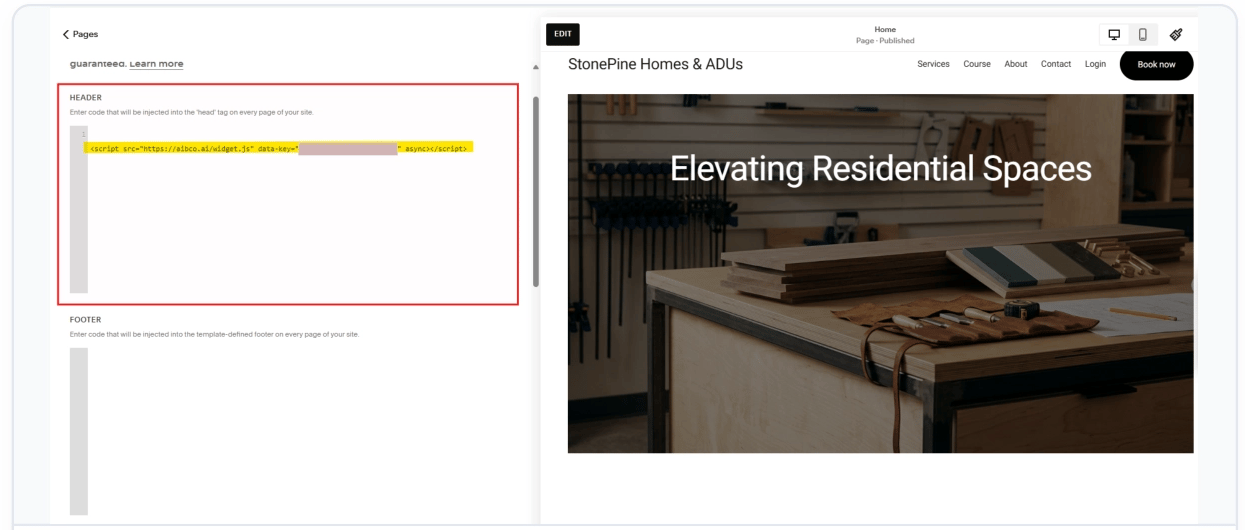
3
Save
Click Save.
Shopify
1
Edit your theme code
In Shopify Admin, go to Online Store. Next to your active theme, click ··· → Edit code.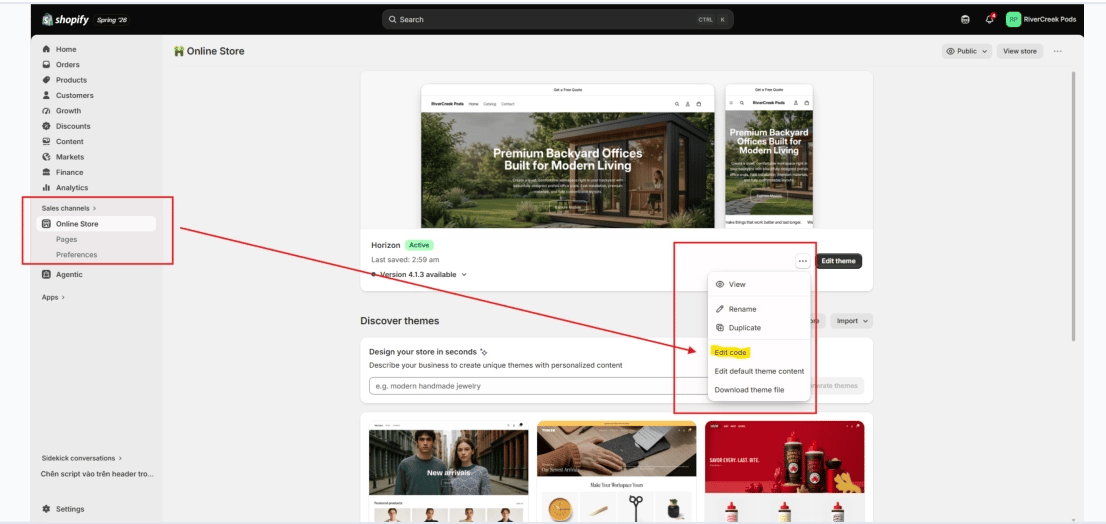
2
Open theme.liquid
Under Layout, click 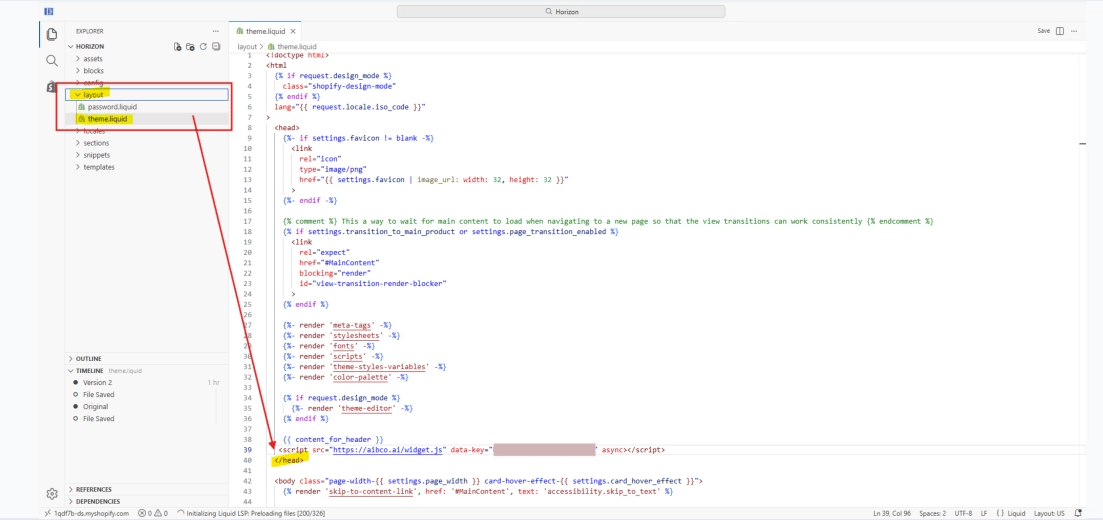
theme.liquid. 3
Paste and save
Find the closing 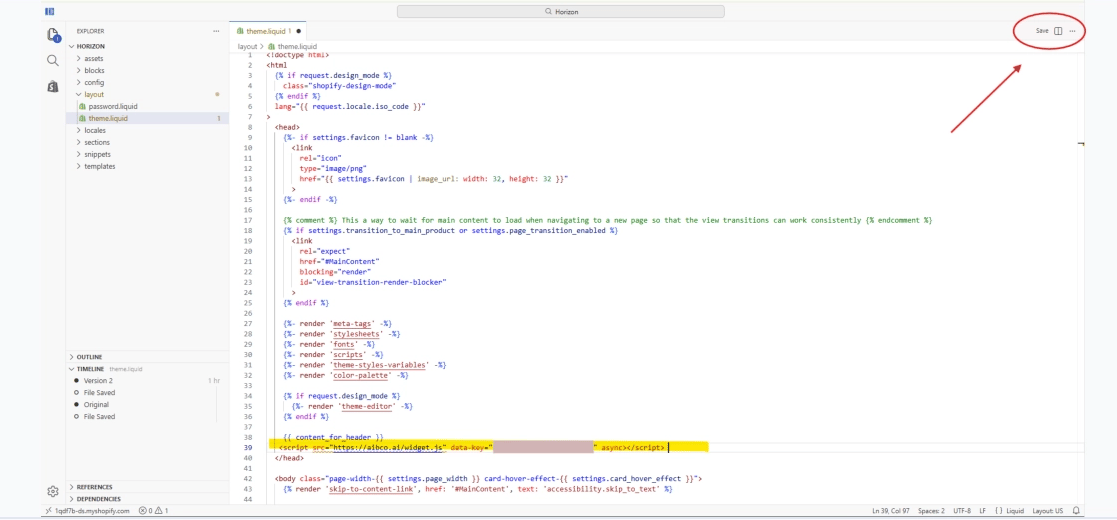
</head> tag and paste your snippet directly above it. Click Save.Wix
1
Open Custom Code
Log into Wix, then go to Settings → Custom Code (under Advanced). 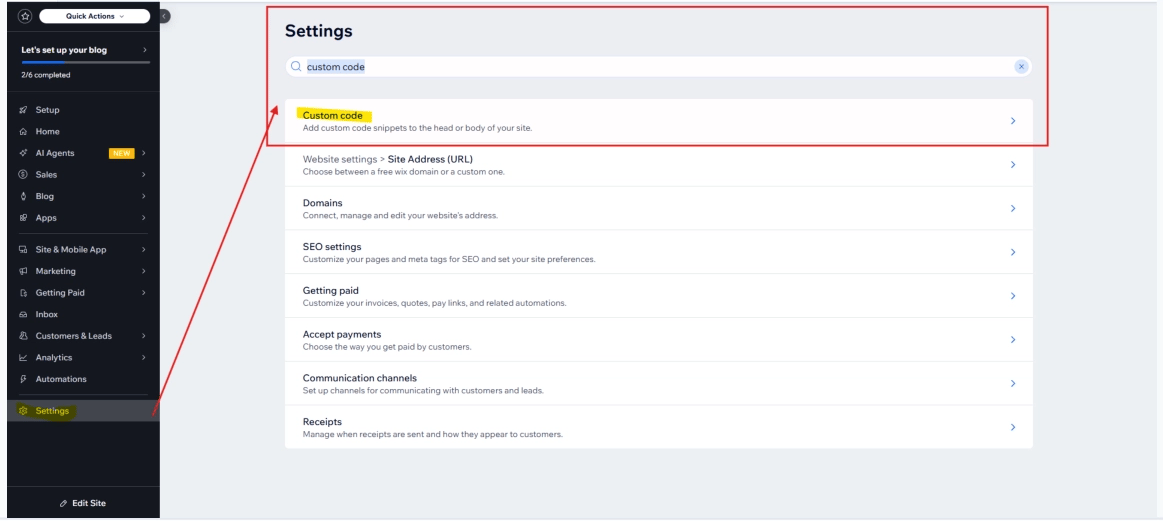
2
Add code to Head
In the Head section, click Add Code. Paste your snippet, name it (e.g. AIBCO Widget), and select Load code on all pages.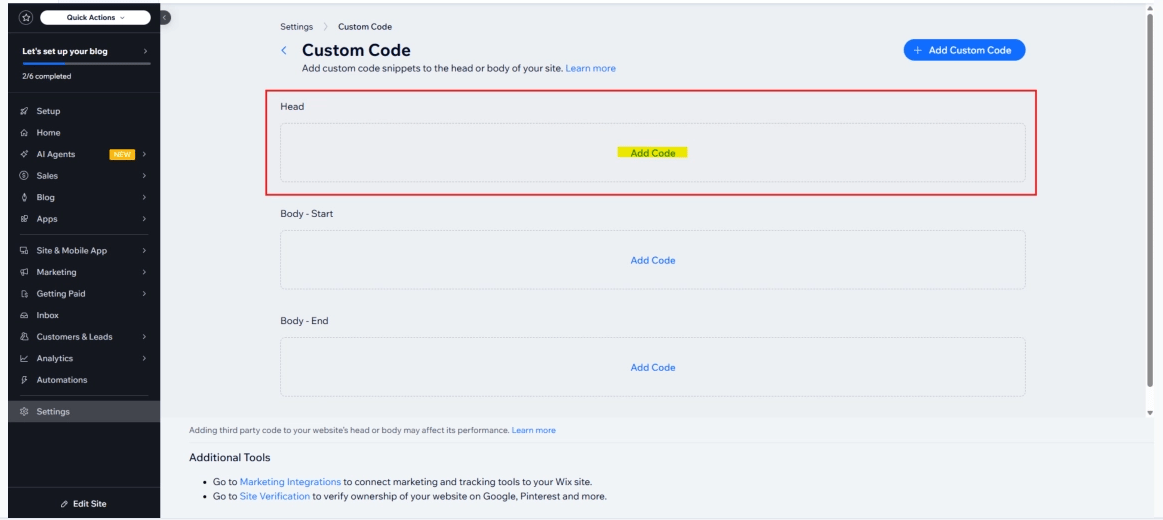
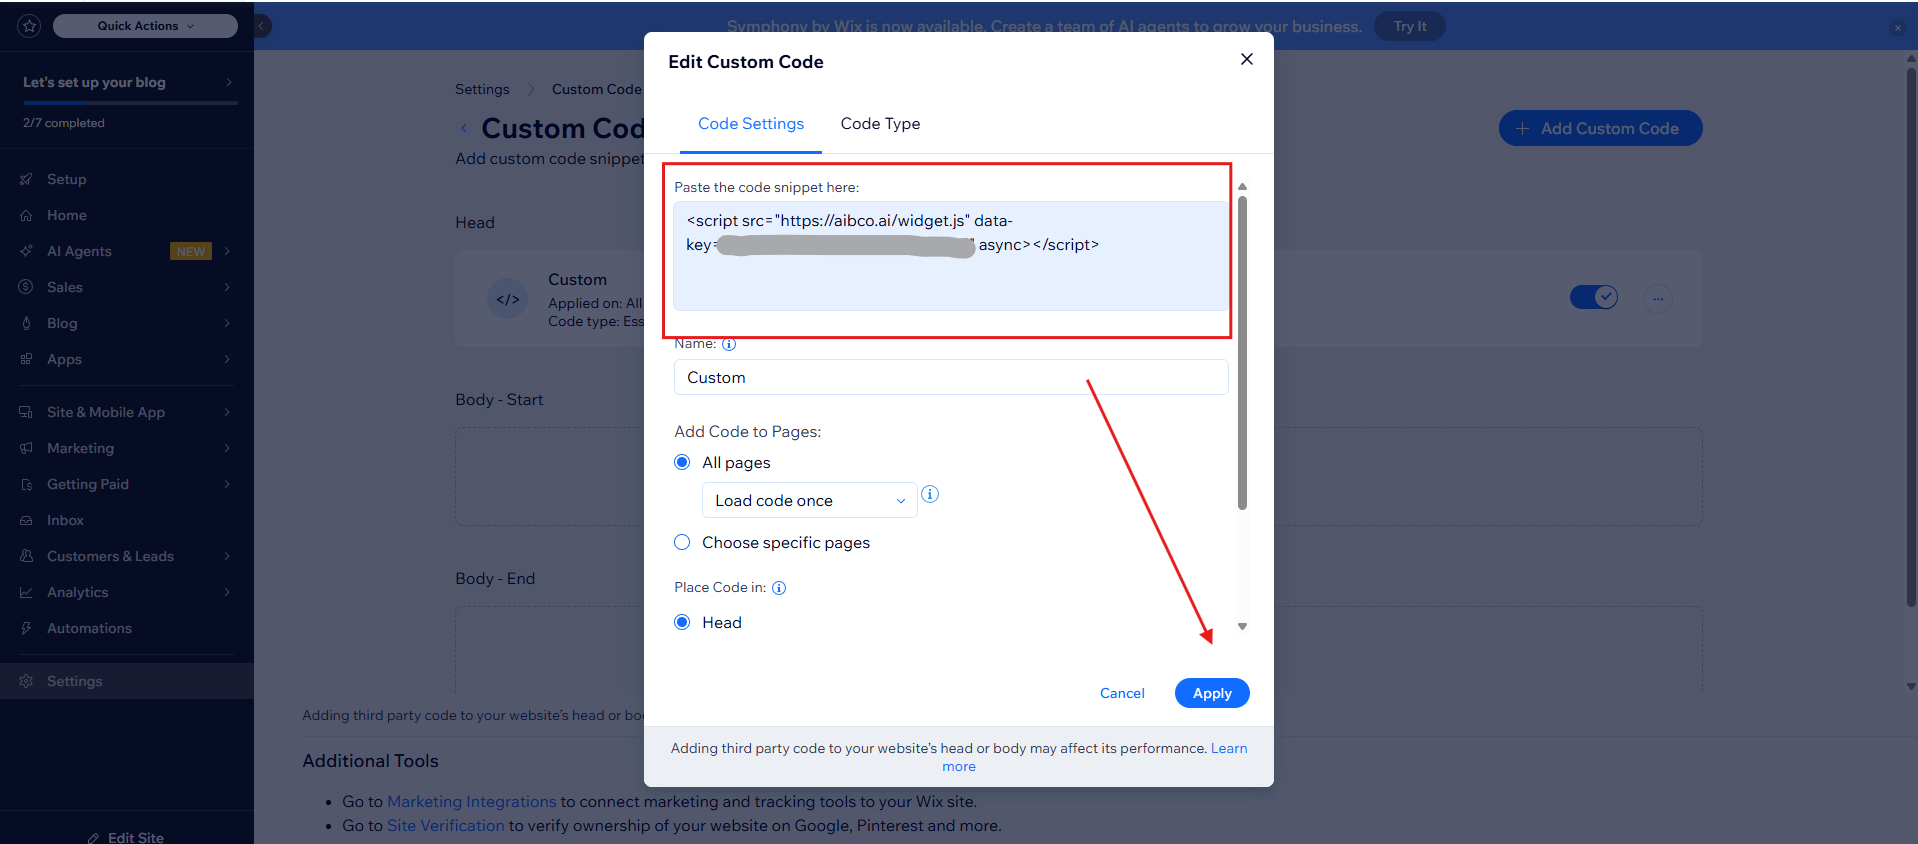
3
Apply
Click Apply. (Make sure the toggle is enabled)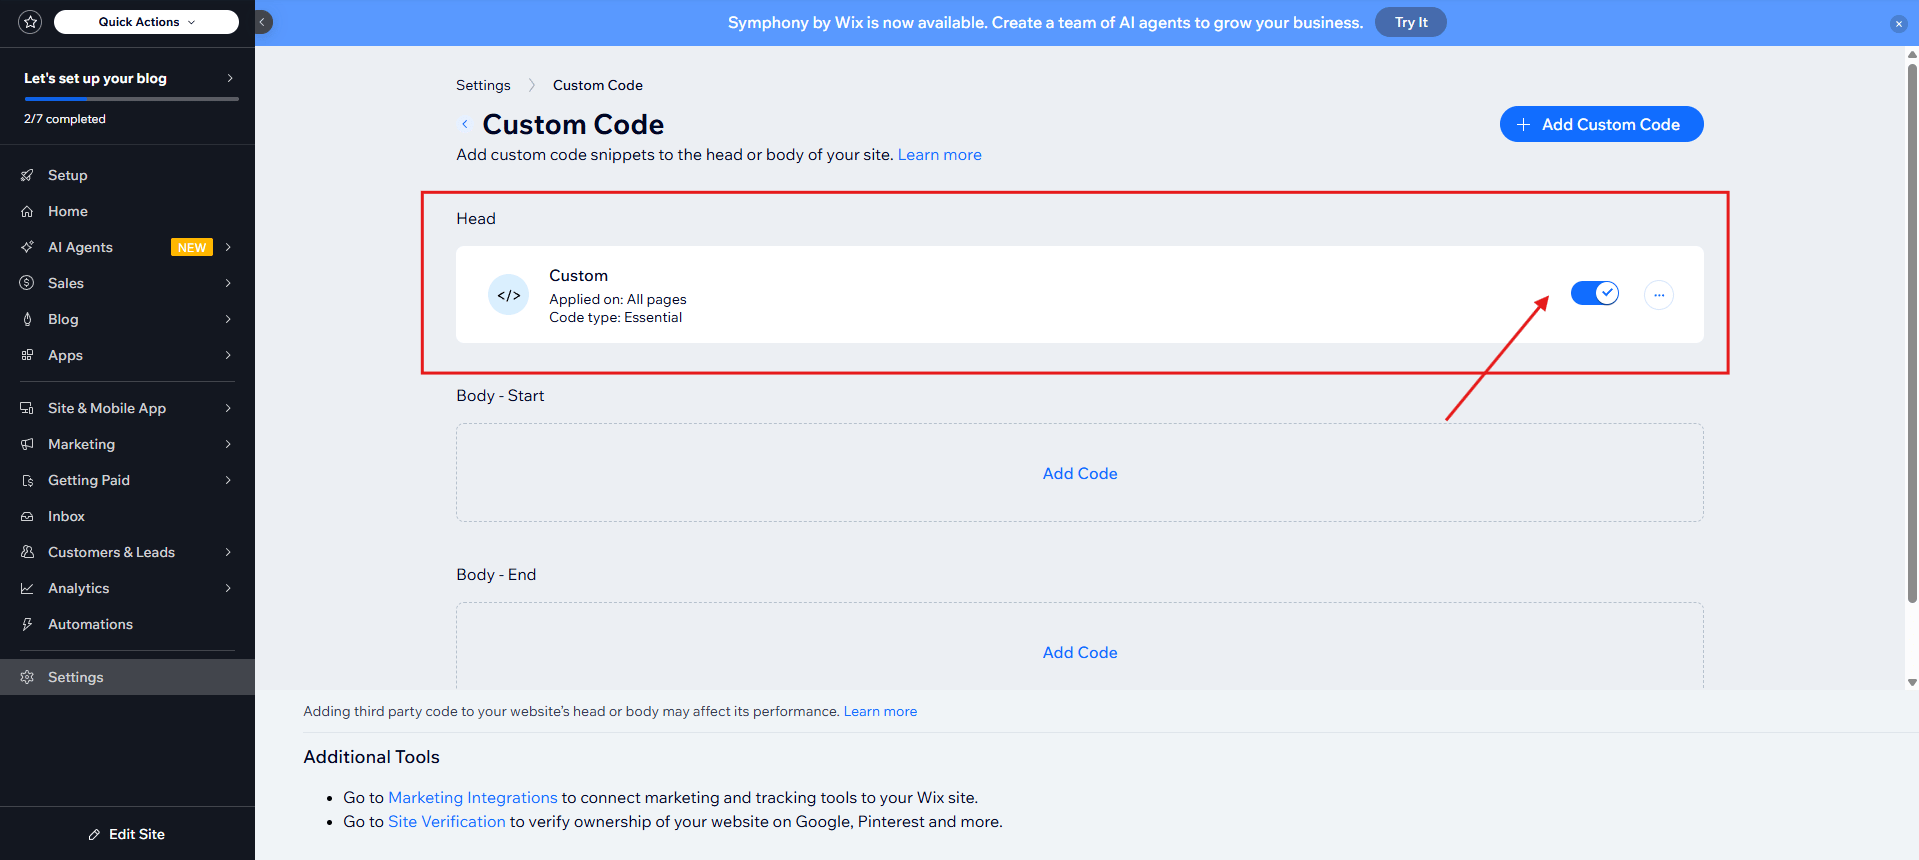
WordPress
- Plugin (recommended)
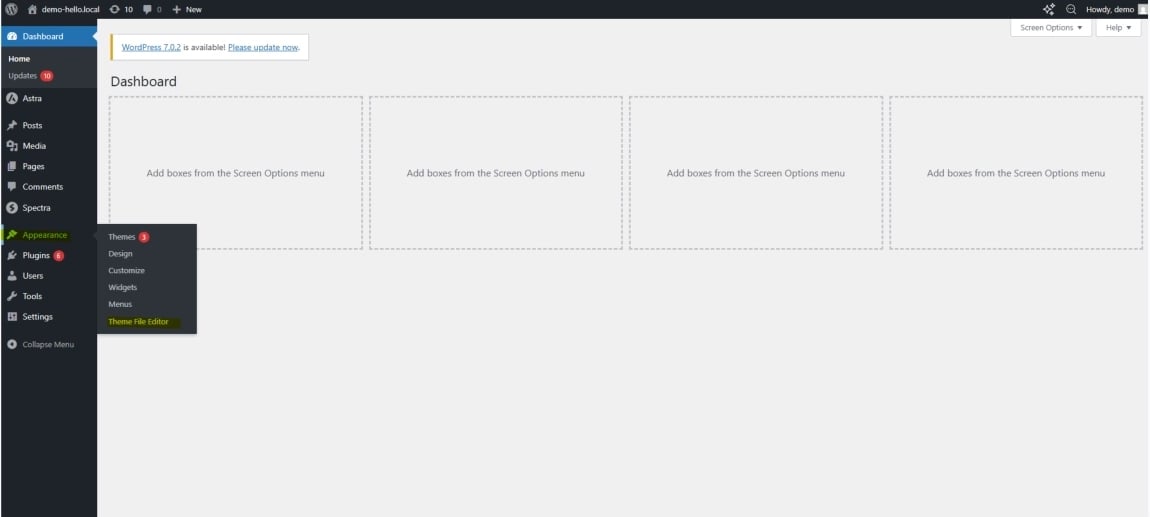
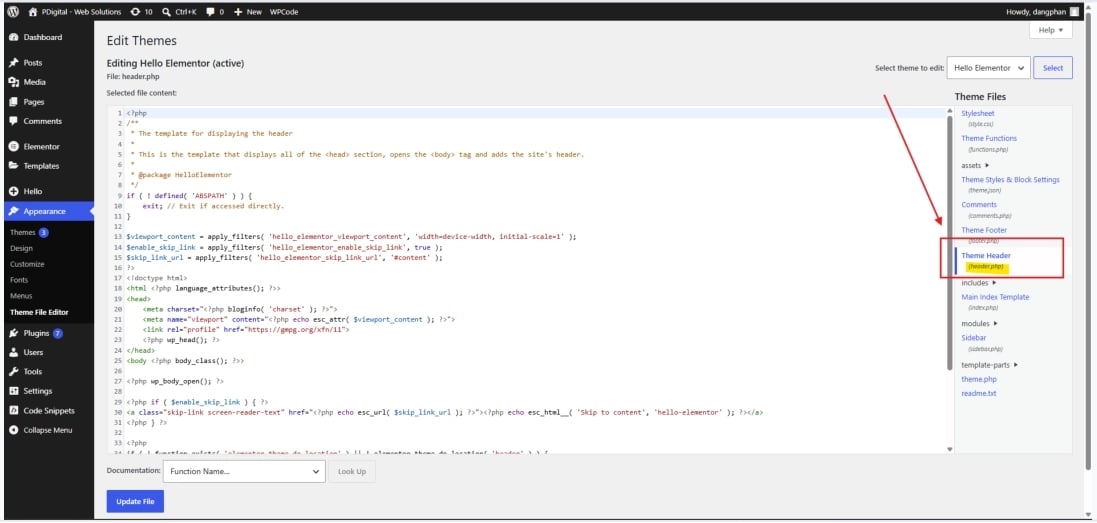
- Theme file (advanced)
1
Install the plugin
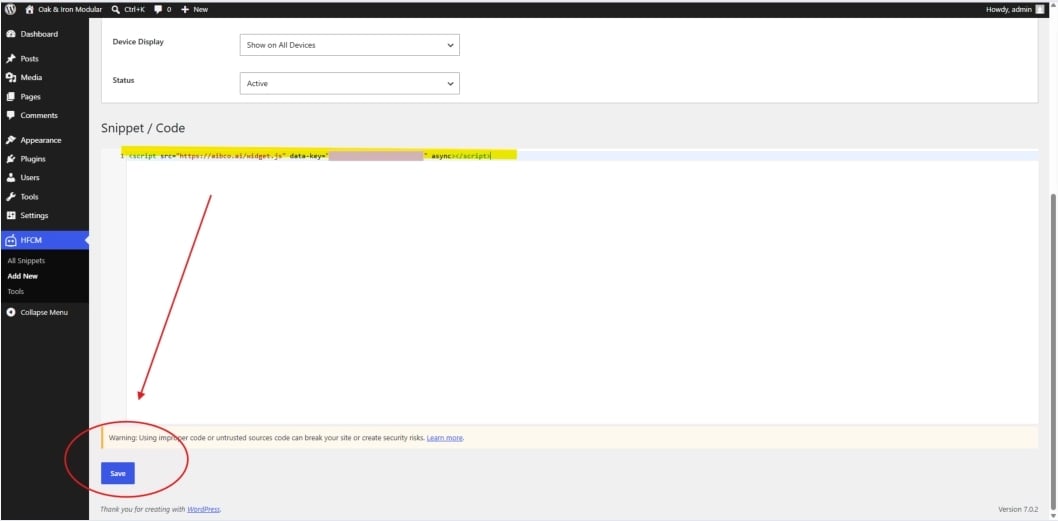
In your WordPress dashboard, go to Plugins → Add New. Search for Header Footer Code Manager (by DraftPress) and install/activate it. 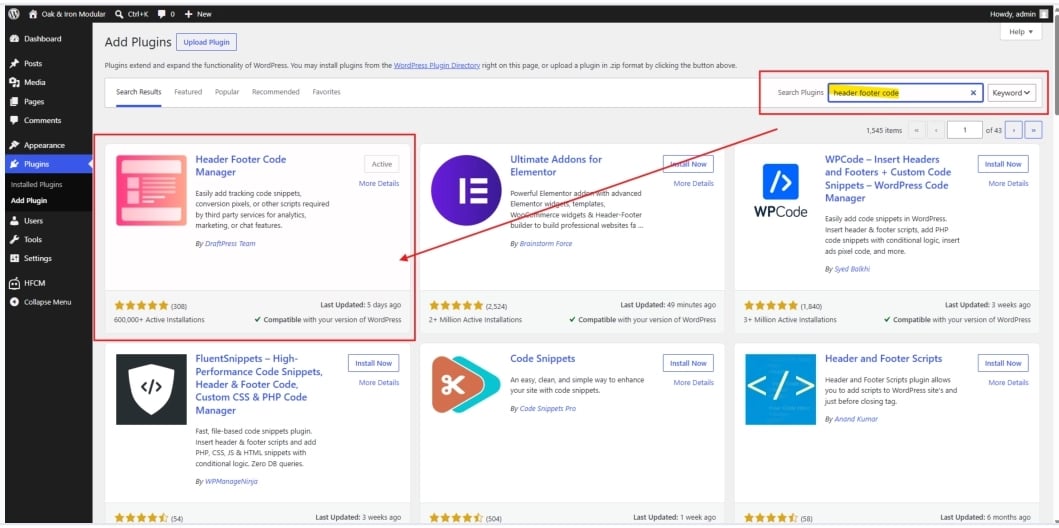
2
Add a new snippet
In the sidebar, click HFCM → Add New Snippet. 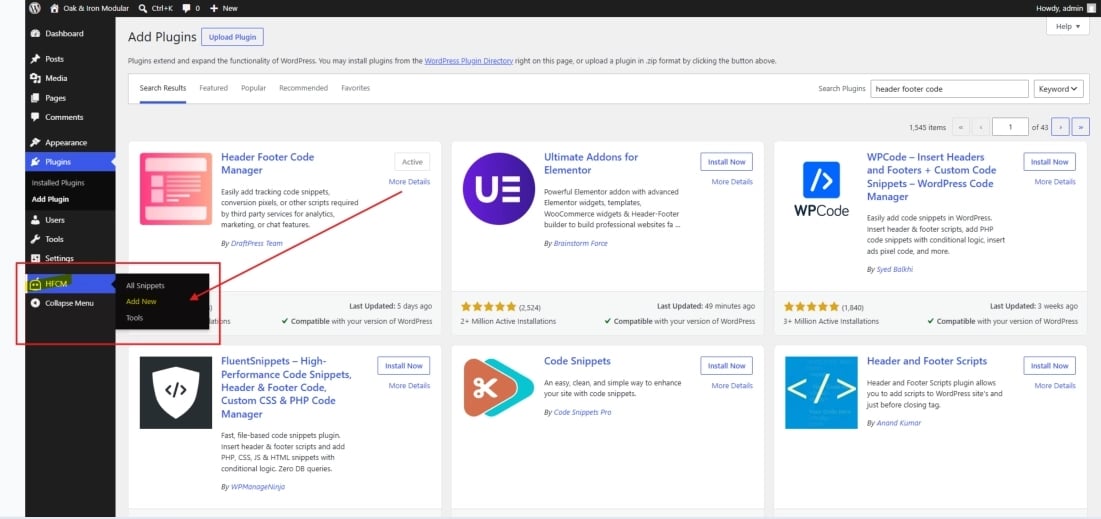
3
Configure and save
Set Name = AIBCO Widget, Type = HTML, Location = Header. Paste your snippet and click Save.